Jo Seagar is one of New Zealand’s favourite cooks and is known as the ‘Queen of Baking’. She’s written lots of delicious recipe books, run award winning Restaurants & Cafes and a cooking school.
We are excited to have Jo helping us out on recipes & product development, and we hope you will enjoy some of her treats below.
We know Gluten Free Pastry can be tricky to work with, but Jo has mastered it!
Click on to see her Video of Tips on using Pavillion Pastry
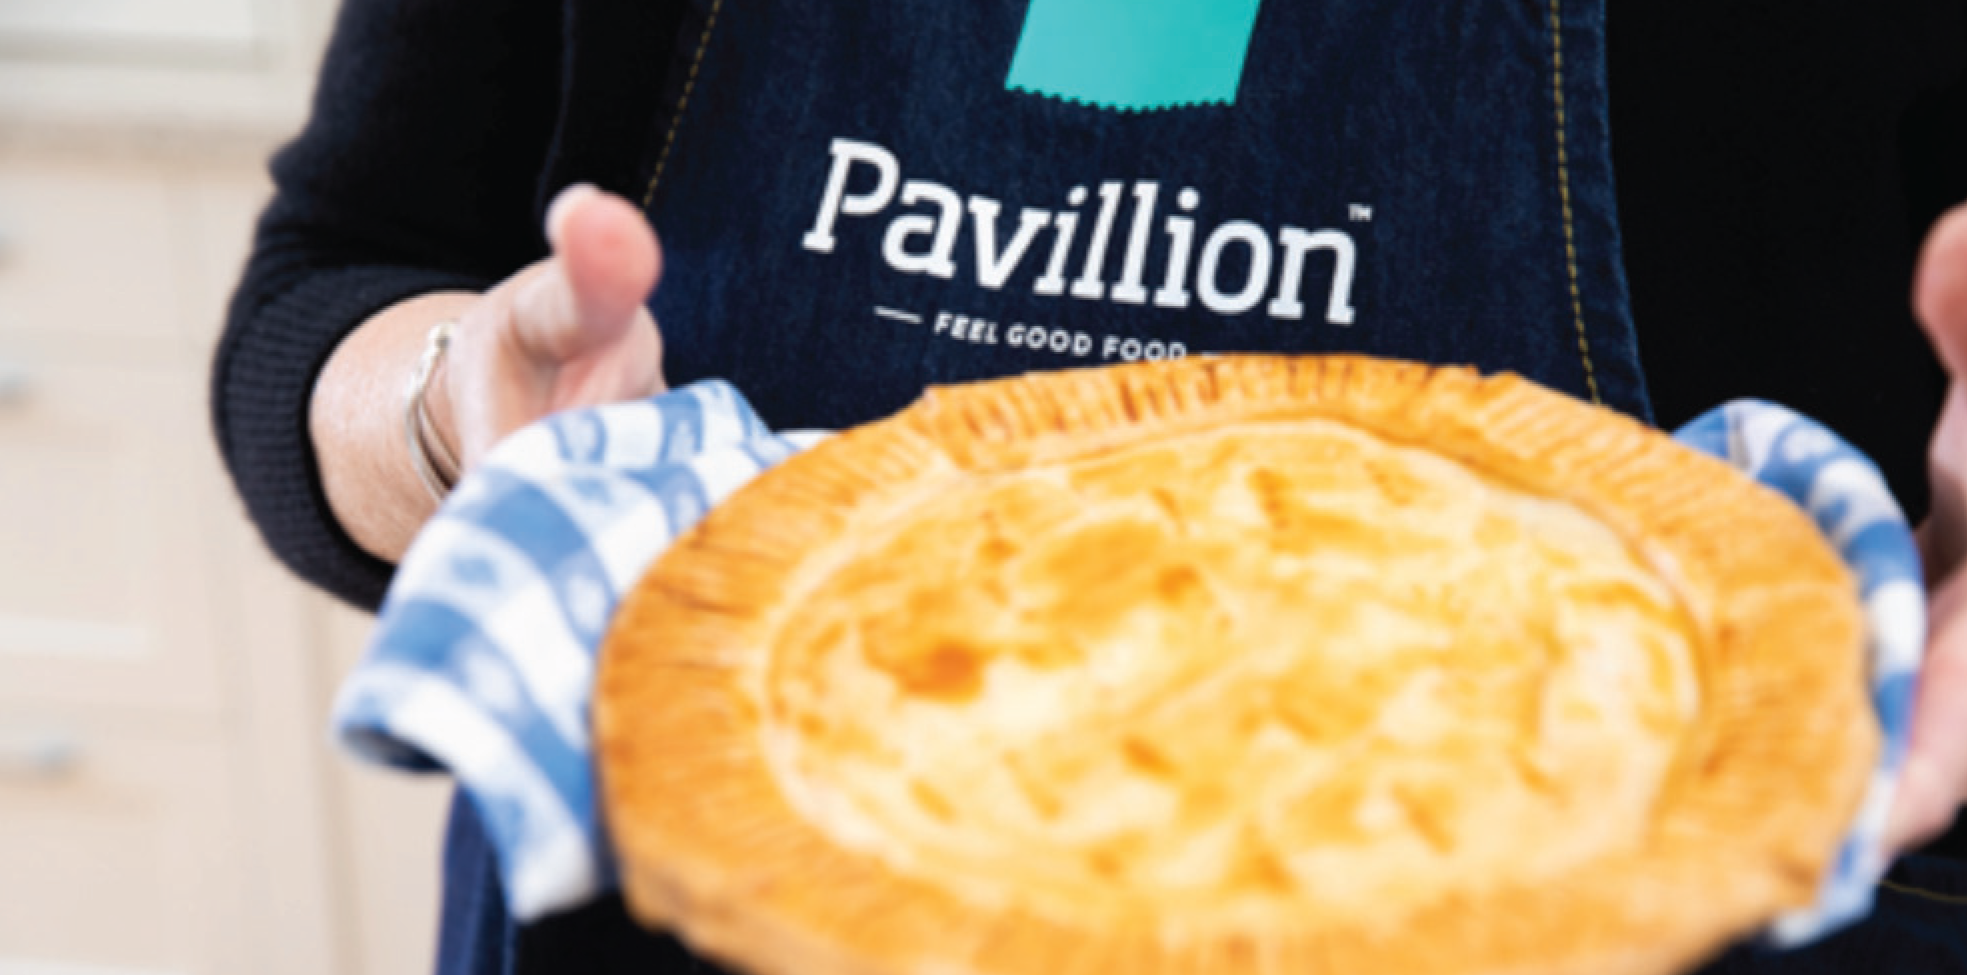
GLUTEN FREE TRADITIONAL BACON & EGG PIE By JO SEAGAR
Our pie is made in a traditional metal 23cm pie plate. Any type of pie dish can be used but metal ones produce the crispest pastry finish.
2 x Pavillion Flaky Pastry Sheets 200gm each, or 400 gm block Pavillion Flaky Pastry Block, thawed to room temperature
¼ cup GF maize cornflour or GF flour mix for dusting the bench surface and rolling pin
1 cup grated tasty cheese
5 – 6 eggs, size 7 or larger
6 rashers rindless streaky bacon
2 tablespoons [a small handful] chopped parsley
Salt & freshly ground black pepper to taste
METHOD:
Spray a pie plate with oil or GF non-stick baking spray. Generously sprinkle cornflour or GF flour onto the bench or board and dust a rolling pin.
Roll the thawed but cool pastry into a rectangle large enough to cut two 23 cm circles. If you are using pastry sheets these are rolled to the correct thickness, but may need to be joined to be large enough to cut the circles – brush the edges with water and press firmly together to join the sheets.
Place one circle carefully into the plate and gently press down into the base, pressing and stretching slightly at the edges to fit the shape of the plate. Sprinkle half of the cheese grated cheese into the base. Cover the cheese with bacon rashers, cutting to fit if necessary.
Break the eggs onto the bacon, reserving one egg yolk in a cup. Puncture the yolks, but do not mix or whisk the eggs. Let them stay relatively in their natural shape – if they are whisked, the pie becomes more like a quiche.
Sprinkle over the chopped parsley and a generous sprinkling of salt and freshly ground black pepper, then sprinkle over the remaining cheese.
With a wet pastry brush, moisten the edges of the pastry and place the second circle over the top. Press the edges together and crimp down with a fork dipped in water to prevent sticking. If desired, pastry scraps can be rolled out to make an extra ribbon of pastry to thicken the edges, this makes a flaky high risen looking pie.
Whisk the reserved yolk with a teaspoon of cold water and brush the surface and edges of the pie. This helps the pastry to colour to a golden brown as it cooks. Prick the surface with a fork or tip of a sharp knife to allow steam to vent.
Place the prepared pie in the fridge or freezer to cool – pastry should be very cold going into a hot pre-warmed oven for best baking results.
Preheat oven to 200°C.
Bake the pie for 20 minutes then reduce the temperature to 180°C and cook a further 15 – 20 minutes until the pastry is crisp and the pie well risen. A deeper bigger pie may take longer to finish cooking.
Cool in the plate for at least 10 minutes before carefully turning out onto a board to cut. Bacon & Egg Pie can be eaten hot or as a cold pie, perfect for picnics.
Tip: The grated cheese in the base and on the surface of the filling not only enhances the flavor of the pie, but also acts a moisture barrier – almost waterproofing the pastry to ensure the result is nice and crispy, flaky and dry.
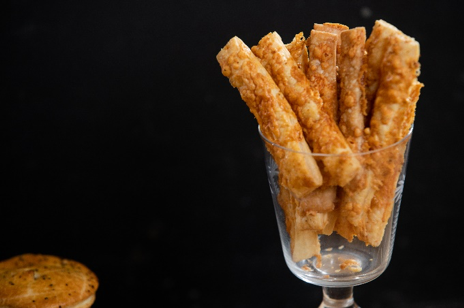
GLUTEN FREE CHEESE STRAWS By JO SEAGAR
Super easy & perfect for entertaining. Makes approximately 100 cheese straws.
Preheat oven to 200°C. Line two oven trays with non-stick baking paper [spraying trays with oil helps the paper stay in place].
Lay the sheets of pastry on a board and cut 1cm strips, then cut these in half so that the strips are like fingers, approximately 10cm x 1 cm. Lay the strips side by side with just a tiny gap between them on the baking paper lined trays. Brush lightly with oil.
I like to chop the shredded parmesan cheese finer into breadcrumb like consistency. Sprinkle this over the pastry then sprinkle generously with garlic salt.
Bake until puffed and golden brown – approximately 20 – 25 minutes. Cool on a wire cake rack and store in an airtight container. These can be frozen.
Tip: Cheese straws are always best if they are just gently warmed before serving. Five minutes at 180°C oven will do this nicely.
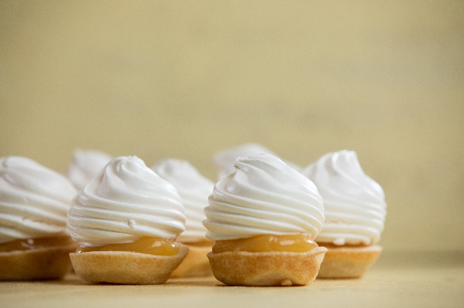
GLUTEN FREE MINI LEMON MERINGUE PIES By Jo Seagar
Everyone loves a Lemon Meringue Pie and a perfect couple of mouthfuls of a mini version is the ideal treat serving.
4 large lemons [Yenben or Lisbon variety are the best for flavor. Meyer are quite sweet lemons]
2 eggs
3 egg whites [save the yolks for the meringue]
1 cup caster sugar
200 gm butter, cut into small cubes
Meringues:
3 egg whites, at room temperature
1 cup caster sugar
A few drops of vanilla
METHOD:
For the pastry cases
Spray three 12-cup mini-muffin or tartlet tins with GF non-stick baking spray. Roll tinfoil into balls [36] the size of a large grape.
Using a 5cm round cookie cutter, press out circles of pastry. You should get 12 per sheet, rolling a little flatter if necessary. Line the tins with the pastry circles, pressing a tinfoil ball into each to prevent the bases puffing up while cooking. Chill in the fridge or freezer to ensure the pastry is very cold before going into the hot oven.
Preheat oven to 200°C.
Bake for 10 – 12 minutes, until puffed and golden brown. While still warm, remove the tinfoil balls [these can be stored for future use]. If the bases are still a little damp, return to the oven for a further 1 – 2 minutes to dry out.
Cool in the tins for 2 minutes then carefully prise out and cool completely on a wire cake rack. These can be stored in an airtight container or frozen at this stage.
To make the Lemon Curd –
Grate the rind and squeeze the juice of the lemons into a medium sized saucepan. Add the eggs, yolks and sugar and, using a wire whisk, stir over medium-high heat until the sugar has dissolved. Add the butter and keep whisking as it melts and the curd thickens. Do not let the mixture boil – and keep stirring!
Once the butter has fully melted and mixed in, cool completely then pour into a clean jar or container and store in the fridge. Curd will thicken as it chills. Can be stored for 3 – 4 weeks in the fridge.
For the Meringues
Preheat oven to 120°C. Line two baking trays with non-stick baking paper.
In a medium sized glass, china or metal bowl [not plastic], beat the egg whites until stiff and holding soft peaks. Very slowly, a teaspoon at a time, add the caster sugar while continuously beating. The mixture will become glossy, thickened and shiny white. Add a few drops of vanilla and mix in well.
Spoon the mixture into a piping bag fitted with a star nozzle. Pipe out 36 small swirls of mixture, approximately 1½ teaspoons of mixture. Allow a little space between each.
Bake for 40 – 45 minutes until the meringues are crisp and dry and easily lift off the tray.
To assemble
Spoon a teaspoon of Lemon Curd into each pastry case, top with a baby Meringue.
Serve at room temperature.
Tip: Can be assembled 2 – 3 hours ahead of serving.